How to Cut & Trim Dog Nails at Home Safely
When you hear your dog’s nails clicking on the floor, you know it’s time for a pedicure. Nail trimming is essential for your dog’s well-being; long nails can cause serious health problems for dogs. But how to trim them correctly without injuring the paws of our pets?
Overgrown Nails Lead to Adverse Health
Sooner or later, most dog owners will need to trim their pet's nails. It’s not only for the aesthetic nature but because nails that are too long can cause discomfort in dogs while walking and, if neglected for some time, serious health problems.
Problems caused by overgrown nails include snagging, splitting, or growing into the pad; these are painful conditions and may lead to bleeding and infections. Long-term or chronic health consequences can occur if the problem is continuously ignored. Our article Canine Nail Length and the Effects on Biomechanics discusses how overgrown nails can alter posture, joint angulation, range of motion and biomechanics of a dog, all of which affect the dog's quality of life.
Knowing how important it is to maintain an appropriate length of your dog’s nails, you may wonder when is the right time to spruce up your pet and how long the nails should be. ‘Look’ and ‘Listen’ are the best principles to follow. If the dog's nails click while walking on a solid surface, it's a good indicator that the nails are too long. We can also look to see how long the nails are when the dog is standing; if its nails touch the surface, they need to be trimmed.
Maintaining Nail Length
The rate at which a dog's nails grow and wear down varies depending on the individual, how often they are exercised, and the surfaces they access. Chances are a dog's nails need to be trimmed regularly, not just once. Walking or playing on hard or rough surfaces such as concrete will wear down their nails more quickly than on soft surfaces. However, the nails may still grow faster than they wear down. For this reason, regularly inspecting nail length should become a routine so that excessively long nails can be noticed and trimmed in time.

Owners can perform nail maintenance at home, or they may choose to take their dog to a groomer. It is better to maintain nails regularly, reducing the length in small amounts rather than big chunks, which is why many owners opt to conduct the maintenance themselves. Therefore, knowing how to cut the nails safely and what equipment options are available is essential.
When choosing which equipment to use, it's essential to consider a few things first. Choose a trimming style that best suits you and your dog; consider the dog’s size, emotional welfare, including any fears; physical welfare, including any range of motion limitations and your abilities. Equipment differs in size for smaller and larger dogs, so be sure to select something appropriate for your dog.
Anatomy of Dog's Nails
Before we explain the details of different nail trimming equipment options, we will first look at the basic anatomy of dog nails; this helps avoid potential injuries.
The Quick and Keratin
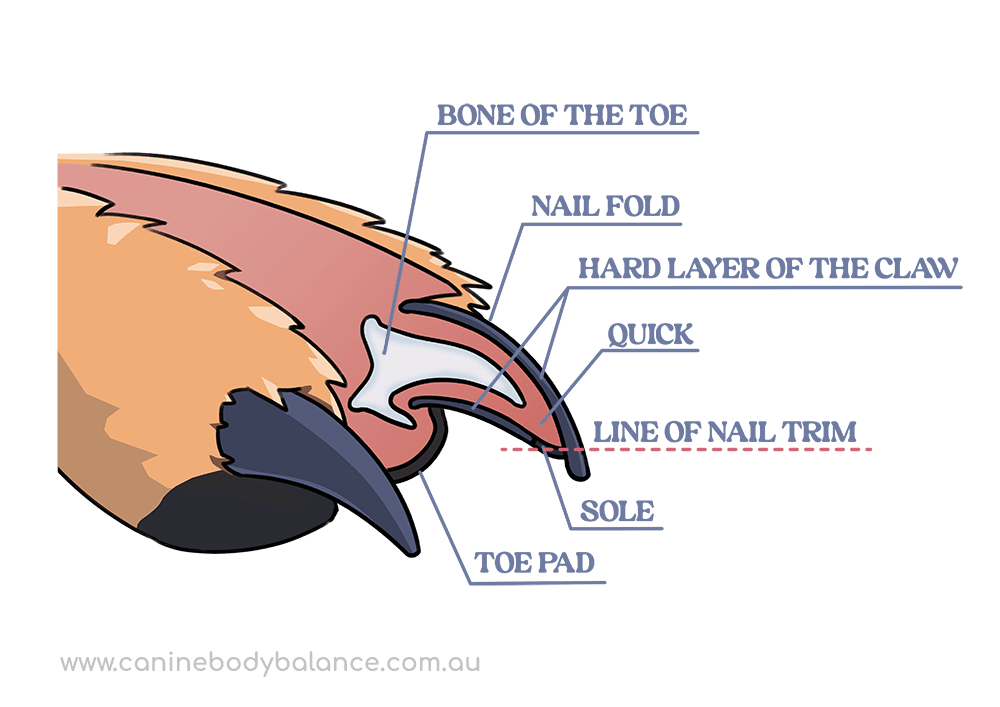
The central collection of blood vessels and nerves inside a dog's nail is called the quick. If the nail is cut too short, this vessel can be damaged and bleed; it is very painful for the dog. Because this is the lowest point of the dog's body, the bleeding associated with severing the quick can be significant and hard to stop. It may lead to infection or physical abnormalities. Long-term emotional fears may also be a consequence for some dogs who have their quicks cut. So, handlers should always aim to prevent this injury from occurring.
The quick is covered with a layer of a solid substance called keratin that covers the sensitive inner nail and protects it. The quick is living tissue, and keratin is not, so keratin can be trimmed freely without pain. Although pain may occur during the trimming process when the equipment or handler twists or bends the nail. Trimming short amounts of nail regularly helps prevent both cutting quick and twisting injuries.
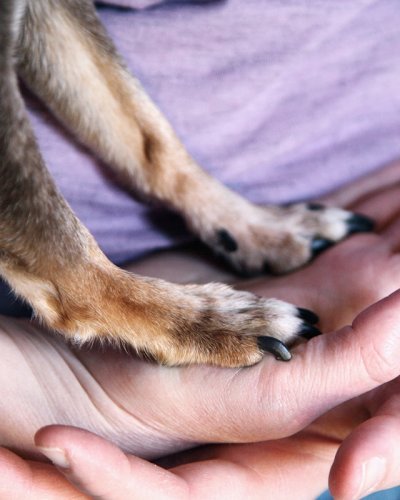
The quick is visible in pets with white nails, so it’s easier for owners to see how much length can be removed. However, with dark nails, it’s not possible to see the quick through the nail. Therefore, it is necessary to approach nail trimmings carefully to avoid injuries.
Equipment Options
There are several options for trimming a dog's nails: scratchboards, nail files, electrical rotary devices, and dog nail clippers. We suggest investing in a few options when choosing the right equipment to add to your home pet supplies. Keep in mind that the best equipment will allow your dog to tolerate or even enjoy this procedure with the lowest amount of stress.
Teaching a dog to accept handling without stress is done through cooperative care; read more about it in our article Canine Cooperative Care. Of course, treatments such as nail trims sometimes require much patience and practice—some dogs are terrified of being treated in any way—so remember that slow progress is still progress. Even if you trim one nail a day, you're on the right track.
Sand Paper
It’s not necessary to cut the nails if the dog dislikes the procedure; they can be shortened using sandpaper. There are different grits of sandpaper; the grit number informs us of how rough/smooth the paper is. Larger numbers are smoother, with finer grains of sand; these are great for polishing the nail or getting a dog used to the process. Smaller numbers are much rougher and will reduce the length of the nail more quickly.
For smaller dogs, it's recommended to use material of 100-120 grit; for medium-sized dogs, 80-100 grit may be more appropriate. The biggest dogs will likely need to start with 60-80 grit.
If coarse grit sandpaper makes your dog uncomfortable, switch to a grit of a higher value. Remember that the higher the number, the softer (less abrasive) the grit. Finishing up the sanding with a fine grade 120 or above will help to prevent splintering of the nail and keep them looking their best.
Scratch Board
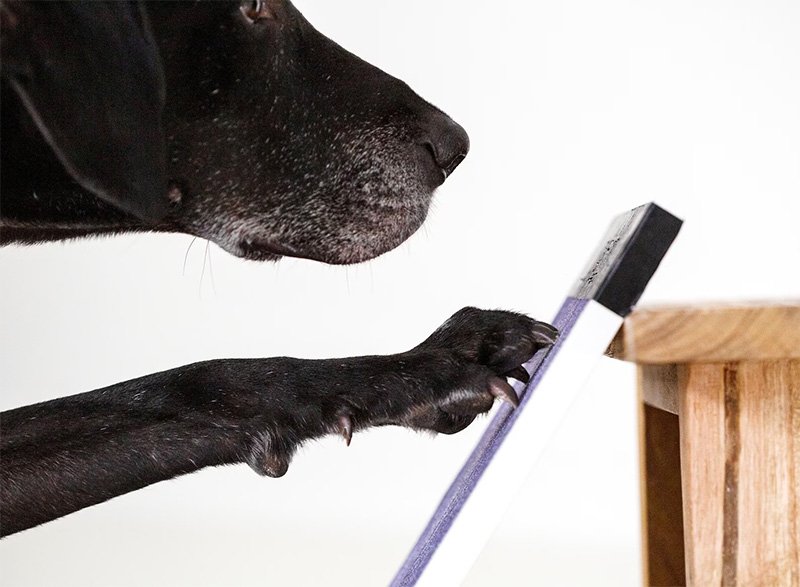
It’s easy to make your own scratchboard; sandpaper is attached to a solid flat surface like a clipboard or a curved surface like a PVC pipe cut lengthways. The owner then teaches the dog how to use this tool for trimming their nails.
In the beginning, the dog is introduced to dragging one paw at a time along the sandpaper on the scratchboard. The final goal is to quickly scratch both feet as if digging, though it might take time until your dog discovers how much fun this can be. We do need to be careful that the dog only scratches their nails and not its paw pads, as this can cause a painful graze.
Scratch boards are great for maintaining the length of the nails on the front feet; however, this method may be less effective for the hind paws simply because it is more natural for the dog to dig with the front paws. You can teach your dog to use the scratchboard with its back legs, although it may be more challenging.
Nail Files
Using nail files is another way to shorten the nails while reducing the possibility of damaging the quick. Reducing nail length this way is slower than using a nail clipper, so the dog must be more patient. But at the same time, this may be a more tolerable method as there is much less risk of injury or pain for the dog, and the handler may feel more confident, leading to a stress-free treatment.
Electric Rotary Devices
This tool is powered by batteries or mains power and has a rotating sanding tip; it functions as a motorised nail file. There are several types on the market with different speed settings and tip types; some may have pressure limiters stopping the device if too much pressure is applied, and others may have a safety guard. Most of these devices make a buzzing sound like an electric shaver, which dogs can be conditioned to, and, once trained, may come running at the sound of the instrument to have their nails trimmed. Initially, many dogs may be frightened of the sound, so it’s essential to take your time with training.
There are several advantages to using it: it makes easy work of trimming large and thick nails that are difficult to cut, and it can be used to round the nails, so there are no sharp edges that appear, such as may occur after cutting. Once trained, trims are quick and easy using this method.
Word of warning: As with any power tool, preventing injury through hair entanglement should be done; the handler's hair should be tied back, and any long fur either trimmed or moved out of the way. Catching hair on a rotary device will rip it and possibly the skin out – prevention is better than asking for forgiveness in this case!
Dog Nail Clippers
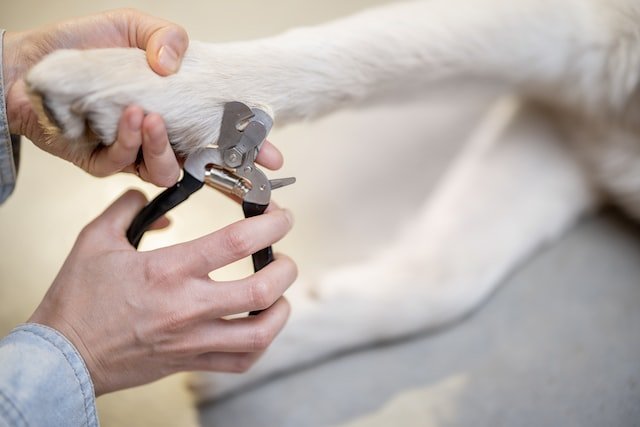
The most common solution is to cut the nails with dog nail clippers. However, this method has the greatest risk of cutting the quick, especially if the dog moves during the process. We recommend slicing off multiple thin sections until the desired length is achieved or you reach the area just before the quick. You should notice a visual change in the nail by cutting thin sections as you get to this area.
Keep in mind that different sizes of clippers are intended for small, medium, and large dogs. So, select an appropriate size with non-slip handles. Keeping the blades clean and sharp will help prevent pain or injury from twisting the nail.
What to Look for in the Equipment
Selecting equipment based on your dog’s size and what they tolerate most easily will help you decide which types of equipment to use. However, we should also consider the technical characteristics of tools that make it easier for us to handle them. This especially applies to nail clippers and electric rotary devices.
When buying any tool, you should check its function before using it on your dog. Check that everything works smoothly, there is no jamming, the hand grip prevents slipping, and you can easily activate the tool. The device should be placed in the hand and checked to see if it fits our palm. If it is too big, too small or does not fit our hand - with the slightest twitch of the dog's paw, we may unintentionally injure the dog.
The blades must be sharp, allowing a smooth continuous cut through the nail. A dull tool may get stuck or require the handler to twist or rotate the clippers causing pain or injury. All dog nail clippers should have a tension spring that pushes the clippers to open smoothly after each cut; this makes the process easier and faster. They usually come with a safety lock, too, allowing them to be safely stored in the closed position.
There are clippers with a safety guard option that allows you to determine in advance how deep you cut into the nail or that prevent an excessive amount of nail length from being cut. These guards should not be relied upon to avoid cutting the quick; this is a potentially dangerous approach—we should observe each nail individually, and if it's challenging to determine where the quick is, we should cut it piece by piece. A safety guard can give a false sense of security, while the only thing this option protects against is not cutting off the entire nail. In no way can this help determine where the quick starts, which is why you should approach the use of such a tool option with caution.
What to Avoid
Any tool that is difficult to handle, does not fit well in our hand, is not sharp, or does not have a non-slip grip should be avoided. If the blade has become dull on nail clippers, we should replace the tool before using it again because dull blades are more likely to cause an injury. Similarly, sanding blocks, tips and paper will wear out and need to be replaced periodically; avoid anything that isn’t efficient at the task or is likely to cause an injury to the handler or dog.
Equally as important as which tool suits us best, we need to observe the dog's reaction. If it shows fear and extreme discomfort, we should not force the dog to undergo a particular procedure. Instead, we should try an alternative method and reach out to a canine behaviourist or trainer that can help your dog learn to accept nail trims confidently.
The Big Question: How Short Should I Cut My Dogs Nails?
So, we learned that there is a painless part of the nail (keratin) and a living part whose cutting causes pain and bleeding (the quick). We also learned that unless the dog has white nails, we cannot tell where one part ends, and the other begins unless we take small cuts and look for the change in texture within the nail.
Dogs who have had long nails for some time will likely have a lengthened ‘quick’; this will reduce slowly as the nail is maintained at a shorter length. When reducing the nail length, it is ideal to trim the nail down to just before the quick.
We want the nail length to be neither too long nor too short. Nails just off the ground when the dog is standing and do not click when walking or on a hard surface are a great length. It may take some time to reduce the nail length to that size. Still, it’s better to do this over a couple of weeks rather than injuring the dog - if you accidentally cut too deep, stop the procedure, and seek immediate veterinary advice.
Consider the Dog in Front of You
Some dogs are extremely sensitive about having their nails or feet touched; we need to consider not only the technical aspects of the equipment but the physical and emotional needs of our dog. Observe your dog as you are working with them, working towards building their trust and confidence by keeping the process as stress-free as possible.
Reading and responding to your dog's body language will help them to relax. You can learn more about your dog's body language, detecting what emotions it may be experiencing in our article, A Guide to Canine Emotional Regulation.
We want to make nail clipping a pleasant experience, which should be done regularly for most dogs. Training them to associate a positive emotion with nail trimming means they will look forward to spending that time with you and enjoying husbandry care.
The Human Element
Finally, think about yourself. If you feel nervous or afraid about trimming your dog's nails, ask for help. Your assistant can calm your dog and keep it still while you cut the nails.
Practising on frozen chicken feet from the shop can help you gain confidence and master your technique before working on your dog's nails. The chicken feet also make a nice treat for your dog, so your dog may learn to associate the nail trimmers with something positive.
If trimming your dog's nails yourself still feels too much, consult a professional groomer who can handle it for you. Be sure to communicate your dog's potential triggers and fears to make the process easier and help your dog feel safer.



Craig Robinson
2022-11-21 08:58
Hi, Tori
Great article, my mother’s greyhound suffers badly from long nails before we got her this area appears to have been neglected & mum’s vet uses nail clippers & frequently draws blood then uses a septic paste, Daisies nails now are really long. I had the same issue with Rose. Dad use to use soldering irons on chickens with great success, they can cauterize & easily trim the nail. Regards Craig